Find the grout product if you can, then choose a cleaner compatible with both the joint and the surrounding tile. Start with pH-neutral routine cleaning on a small patch and judge it after drying. Crumbling grout, open cracks or new dullness on the tile call for a different next step, not harder scrubbing.
In this answer
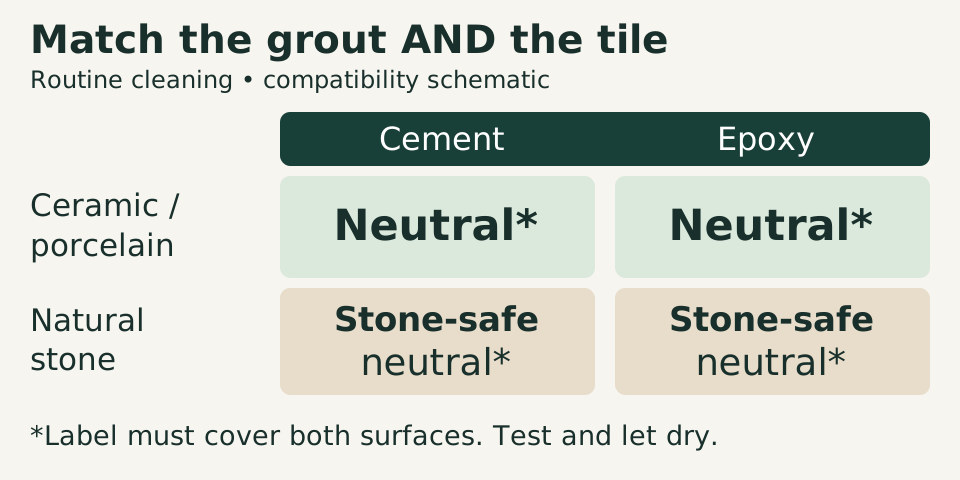
Enlarge diagram
Swipe across to see the rest of the diagram.
Identify the grout without damaging it
Look for a leftover bag or tub, a renovation invoice, or the installer’s product record. Match the full name to the manufacturer’s product description: cement-based or cementitious, epoxy, or premixed/single-component. A color name alone will not identify the material.
Texture is a poor shortcut. LATICRETE’s SPECTRALOCK PRO Premium is an epoxy grout that contains sand. Water beading is also inconclusive because a sealer can make cement grout repel water. Do not scratch the joint or apply vinegar to identify it.
A premixed product advertised as having epoxy-like performance needs its own care instructions. If the product remains unknown, keep it in the unknown category: choose a neutral stone-and-grout cleaner labeled for the surrounding surfaces, test discreetly, and avoid stain removers until compatibility is established.
Let the surrounding tile set the limit
Include stone accents, a marble curb and any metal touched by runoff. A cleaner can suit the grout and still damage what is beside or below it. The Natural Stone Institute discourages acidic cleaners even on generally acid-resistant siliceous stone because other minerals may be present.
For routine cleaning, leave vinegar, lemon juice, toilet-bowl cleaner and acidic descalers out of this job. Acids can attack cement grout and etch susceptible stone. A stone-safe label matters more than a broad “bathroom cleaner” claim.
Scroll across to read every column.
| Grout and adjacent surface | Start here | Before stronger treatment |
|---|---|---|
| Cement + ceramic or porcelain | pH-neutral tile-and-grout cleaner; gentle nylon brush | Confirm tile finish, grout and any sealer compatibility. |
| Epoxy + ceramic or porcelain | Neutral cleaner allowed by the grout maker | Chemical resistance is product-specific; do not assume steam is safe. |
| Cement or epoxy + natural stone | Neutral cleaner expressly labeled for that stone and grout | Avoid acid. Test the tool as well as the liquid on polished surfaces. |
| Unknown grout or uncertain stone | Neutral stone-and-grout cleaner after a discreet test | Identify the materials before using a specialty stain remover. |
Clean one test strip before doing the whole floor
This routine is for existing, cured grout. Newly installed joints have product-specific cleaning and curing schedules; a film left by installation needs the installer’s grout-haze procedure.
Gather a small nylon grout brush, soft cloths or a sponge, clean rinse water and a labeled neutral cleaner. Use the label’s gloves, eye protection and ventilation precautions. Keep children and pets away while working and drying. Use one cleaner at a time; do not mix chemicals.
- Remove loose grit with a soft brush or a surface-safe vacuum attachment. Choose a short, inconspicuous joint plus its tile edges. Note its dry color and any existing cracks before wetting it.
- Prepare the cleaner exactly as labeled. For example, STONETECH Stone & Tile Cleaner concentrate specifies 2 fluid ounces in 1 gallon of warm water for light-duty cleaning. Its ready-to-use version is a different preparation; do not use the concentrate straight from the bottle.
- Apply a little prepared solution with a sponge. Gently brush the grout line with nylon bristles, keeping the brush off delicate tile edges as much as possible. Stop if the joint sheds material or the tile finish changes.
- Lift the dirty solution with clean absorbent cloths rather than spreading it over the next row. Rinse the joint and tile with clean water and collect that water, changing cloths and rinse water as they become dirty. For a large floor, TCNA recommends extraction with a vacuum rated for wet pickup.
- Let the patch dry fully before comparing it with the untouched area in the same light. Continue in small sections only if it looks cleaner without new scratches, dullness or joint loss.
Read the dry result before changing cleaners
A lighter patch is useful evidence only when the joint is intact. Removing grout itself can also change its color. Conversely, an unchanged stain does not prove permanent damage; this cleaner may simply be wrong for that deposit.
Color differences present since installation can come from mixing, cleanup or drying conditions. Cleaning may not correct those differences, and the intended grout color may never have been white.
Scroll across to read every column.
| What you see | What to do next |
|---|---|
| Soil lifts; the dry joint is cleaner and intact | Continue the same routine. Finish removing dirty water and cleaner residue. |
| Intact joint, but the same color patch remains | Treat this as unresolved discoloration. Check when it appeared and what contacts that spot; use that history, not color alone, to choose the next treatment. |
| White powder returns after drying | Do not assume it is soap. Mineral movement and installation residues are possibilities; ask the installer to investigate recurring deposits and moisture. |
| Grout crumbles, has missing sections or open cracks | Stop wet scrubbing that area. Arrange joint or installation assessment; a cleaner will not replace lost material. |
| A stone tile becomes dull while the joint looks cleaner | Stop that product. Acid etching changes the stone finish and may need professional restoration. |
| Loose tile, persistent wetness or water outside the shower | Pause cleaning and have the assembly assessed. Even epoxy grout is not a substitute for waterproofing. |
If neutral cleaning leaves a deposit
Check whether the mark has been there since installation and what routinely lands there: soap or shampoo near a shower shelf, or a known oily spill. These history and location clues help narrow the options; appearance alone does not identify the deposit. For its cement grouts, LATICRETE separates grease cleaners from soap-scum and mildew-stain removers. Confirm the exact product is permitted on the grout, tile, sealer and exposed hardware, then follow its dilution, contact time and rinse instructions on another small patch.
Do not escalate automatically to bleach, a drill brush or steam. SPECTRALOCK PRO Premium specifically excludes aggressive steam-cleaning regimens. Acidic mineral-deposit treatment is a separate, material-sensitive procedure; the routine chart above does not authorize it.
If a compatible targeted treatment still has no effect, send the grout maker or installer the product name, a dry photo and what you used. Ask whether the next step is a different stain treatment, color restoration or repair. That is more useful than asking for the strongest cleaner.
Decide about sealing only after cleaning
Sealer is not a way to clean or rebuild a damaged joint. For sound cement grout, check whether its maker recommends sealing after the area is clean and dry. Some modern cement grouts, including PERMACOLOR Select, do not require it. SPECTRALOCK PRO Premium epoxy grout also does not require sealing.
Remove spills promptly. If the joint quickly looks dirty again, check for a sticky cleaning film before repeating a stronger treatment.
Check the surfaces your cleaner will touch.
Open the shower checklistSources
- Natural Stone Institute: Care & Cleaning of Natural Stone ↗
Stone-compatible routine care; acids, abrasives and etching.
- Tile Council of North America: Cleaning Grout ↗
Cement porosity and acid attack, sealer behavior, removal of dirty solution and cleaner residue; white deposits have several causes.
- LATICRETE: Cement Grout Care & Maintenance, TDS 113 ↗
April 20, 2026 US guidance: neutral routine care, gentle nylon brushing, dry test, stain-specific escalation and optional sealing for PERMACOLOR Select.
- LATICRETE: STONETECH Stone & Tile Cleaner, DS-211-1026 ↗
US concentrate dilution, ready-to-use distinction, application, protective equipment, small-area testing and listed surfaces.
- LATICRETE: SPECTRALOCK PRO Premium Grout, DS-681-1026 ↗
Identifies a sanded epoxy grout, neutral maintenance, no required sealing, steam-cleaning restriction and waterproofing limitation.
- LATICRETE: Cement Grout Troubleshooting Guide, TDS 201 ↗
Distinguishes weak powdery joints, surface white powder and installation-related color shading.
- LATICRETE: SPECTRALOCK 1 Pre-Mixed Grout ↗
Demonstrates a separate premixed product marketed with epoxy-like performance; the performance claim alone is not proof that installed grout is conventional mixed epoxy.