For fingerprints and grease, wipe with mild soapy water, remove the soap with a clean damp cloth, and dry. Follow the metal's fine grain lines. Before adding stainless steel polish or vinegar, identify the finish: a cleaner permitted on a plain sink can damage an appliance's fingerprint-resistant coating.
In this answer
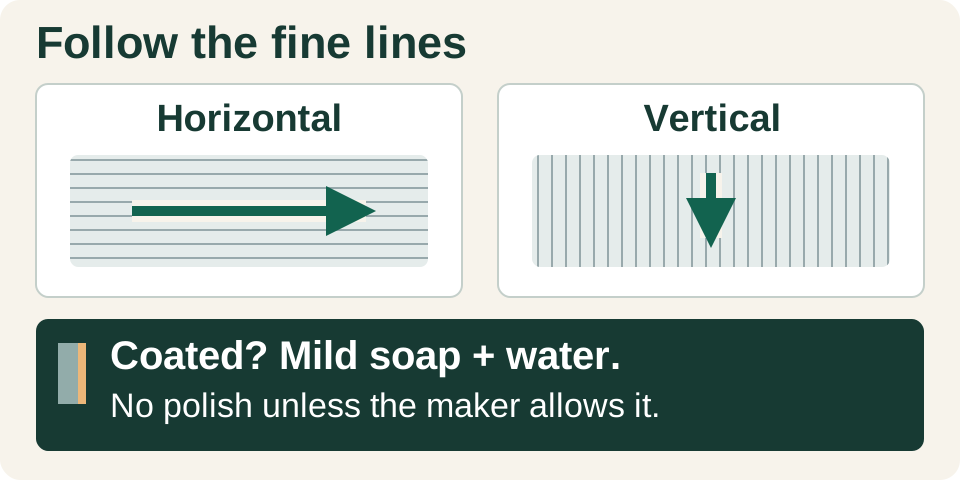
Enlarge diagram
Swipe across to see the rest of the diagram.
Check the finish, not just the silver color
Find the full model number on the appliance label and look up its finish on the manufacturer's product page or care instructions. A receipt or original product listing can help. Look for terms such as fingerprint resistant or PrintShield. A generic manual may cover several finishes, so match its cleaning section to your actual model.
You cannot reliably identify a clear coat just by seeing grain lines or fingerprints. GE says its fingerprint-resistant finish is designed to blend with ordinary stainless steel. If the finish is still uncertain, stay with mild soap, water and a soft cloth until you can identify it.
Black stainless, colored metal and enameled sinks also need their own finish instructions. Do not treat them as bare stainless because they have a metal base.
Choose a cleaner for both the finish and the mark
The appliance or sink maker's restrictions come first. A bottle labeled for stainless steel does not automatically cover a clear coat. For example, Weiman's aerosol FAQ excludes fingerprint-resistant finishes even though its broad product description discusses stainless steel generally.
Scroll across to read every column.
| Surface and problem | Start here | Before using anything stronger |
|---|---|---|
| Plain stainless appliance: fingerprints or cooking grease | Mild soapy water; clean damp wipe; dry | Use a stainless cleaner only if the appliance maker allows it. |
| GE fingerprint-resistant or KitchenAid PrintShield: smudges | Mild soap, warm water and a soft microfiber cloth | No stainless polish, vinegar, glass spray or abrasive cleanser. |
| Black, colored or unidentified finish | Mild soap and water unless its care instructions differ | Confirm the finish before trying a specialty cleaner. |
| Plain stainless sink: ordinary food film | Mild detergent, soft sponge, thorough rinse and dry | Use the sink bowl instructions, not the faucet instructions. |
| Plain stainless sink: persistent mineral spots | Wash first; then use a maker-approved mineral treatment | Kraus permits vinegar for the sinks covered by its guide; do not transfer that advice to coated appliances. |
Remove fingerprints and grease with a clean rinse
Set out mild dish soap, warm water and clean soft cloths: one for washing, one for the plain-water wipe and a dry one for finishing. Keep gritty sponges and steel wool out of the job. Let a range or hood cool and turn its controls off; follow any model-specific power precautions before cleaning.
Look across the surface in side light. The fine brushed lines may run horizontally on one panel and vertically on another. Wipe along those lines. If no grain is visible, use gentle strokes rather than trying to create a brushed pattern.
- Dampen a cloth with warm water and lift off loose food or dust. On an appliance, wring it out so water does not run into controls, seams or openings.
- Wash a manageable area with mild soapy water, following the grain. For a greasy handle or hood exterior, turn to a clean part of the cloth as it picks up soil rather than spreading it across the panel.
- Wipe again with a separate cloth dampened with plain water. Remove the soap film before drying; repeatedly rubbing the same soapy cloth over the surface is not a rinse.
- Dry with a fresh soft cloth, still following the grain. Look at the dry panel from the side. If the fingerprints are gone and the finish is even, stop. It does not need polish simply because it is stainless.
Treat sink water spots separately from oily smears
Empty the sink and remove loose debris. Wash the bowl with mild detergent and a soft sponge, rinse thoroughly, then dry it. A mark that disappears at this stage did not need a mineral remover. White rings or crust that remain are a reason to check the sink's hard-water instructions, rather than adding more soap.
For the conventional stainless steel sinks covered by Kraus's linked guide, apply vinegar with a soft dishcloth, gently rub the mineral deposit, then rinse with water and towel dry. Rinse after wiping; do not leave vinegar in the sink overnight. Keep the treatment inside the bowl, away from countertops, faucet finishes and trim that may have different care requirements.
On another brand or a coated sink, use its permitted mineral treatment instead. Check the dry result before repeating anything. If one patch clears, finish the remaining deposits by the same approved method. If the surface changes color or becomes dull, stop and ask the maker about that finish.
After use, a quick rinse and towel-dry keeps water from evaporating into new deposits. Do not leave steel wool or a wet cleaning pad sitting in the bowl.
If it streaks, change the cloth or the final step
Let the surface dry before judging it. Work on one small area with the corrections below; that makes it easier to tell whether you have removed a film or are looking at an unchanged mark.
- Streaks after soap: wipe again with fresh water and a clean cloth, then dry. If that clears the test area, rinse the rest of the panel and use less soap next time.
- Greasy trails that move with the cloth: switch to a clean cloth face. If you are using an approved cleaner/polish, finish with a separate dry cloth. Weiman's aerosol instructions specifically require that buffing step.
- Dried droplet outlines: work in smaller sections and dry each one before moving on. On a sink with persistent crust, return to the mineral-deposit instructions above.
- A fixed dull patch or line: stop adding cleaner once a gentle wash, rinse and dry leaves it unchanged. Photograph it dry in side light and record the products already used before asking the manufacturer for a finish-specific next step.
Do not turn a cleaning problem into a scratched finish
Keep polish off plastic trim and rubber gaskets. Avoid bleach, oven cleaner and abrasive pads for the routine described here. A sink-cleaning product is not an appliance-coating repair product.
Even a product called Soft Cleanser can contain abrasive material: Bar Keepers Friend lists glass oxide abrasive and acids in that formula. Its label calls for a small-area test and rinsing within one minute. Those directions do not override a surface manufacturer's ban on acids or abrasives, and the product is not a substitute for mild soap on a coated door.
Do not sand or scour a coated appliance to remove a remaining mark. GE states that it has no approved repair method for heavy or more visible scratches in its fingerprint-resistant finish.
Cleaning the hood too? Check its filters.
Wash or replace the right filterSources
- KitchenAid: How to Clean Stainless Steel Appliances ↗
Soft cloths, wash/rinse/dry sequence, grain direction and restrictions for PrintShield.
- GE Appliances: Fingerprint Resistant Stainless Steel ↗
Clear coating, similar appearance to traditional stainless, prohibited cleaners and limits on scratch repair.
- Kraus: Care & Maintenance ↗
The stainless steel kitchen sink section supports mild detergent and the vinegar wipe/rinse/dry method.
- Sterling: How to Clean & Care for Stainless Steel Sinks ↗
With-grain cleaning, separate dry cloth and prevention of water deposits.
- Weiman: Stainless Steel Cleaner & Polish Aerosol ↗
Product-specific wiping/buffing directions and FAQ exclusions for fingerprint-resistant, painted and faux finishes; not blanket approval for every appliance.
- KitchenAid: Stainless Steel — Vent Hood ↗
Traditional-stainless cleaning and keeping polish off plastic and rubber.
- Bar Keepers Friend: Soft Cleanser ↗
Formula includes abrasive material and acids.