In this guide
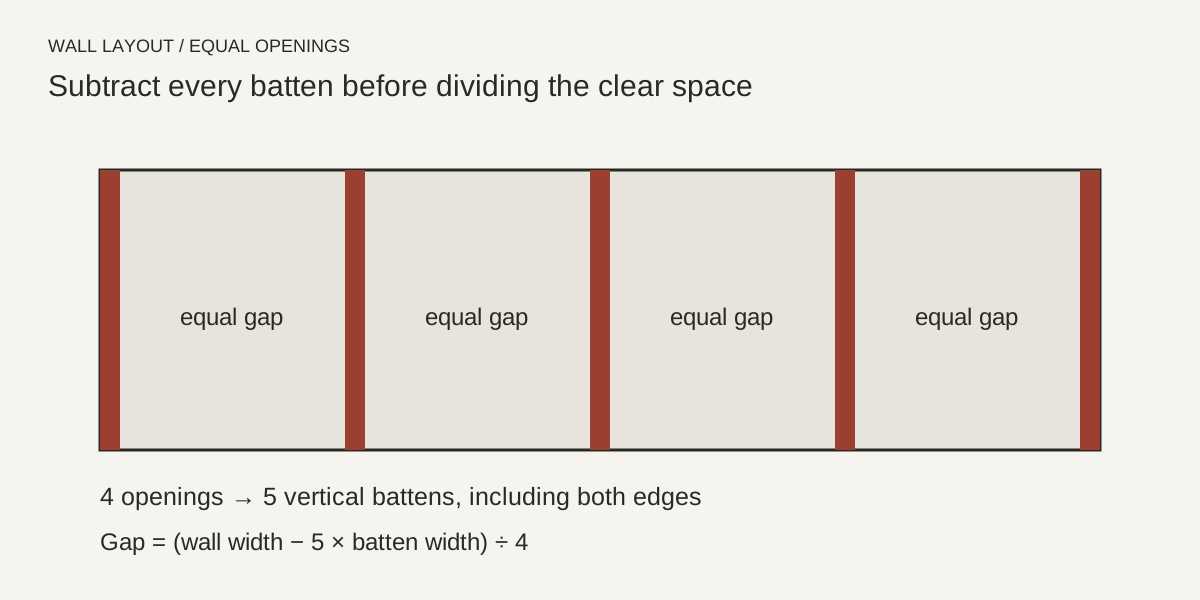
How many battens belong on the wall?
Draw the two ends of the wall first. A vertical board against each corner, an open margin, and an existing door casing all give you different starting points. The calculation below assumes one equal-width vertical board at each end, with equal clear openings between them. It is for decorative trim on a sound interior wall.
Measure the finished width near the bottom, middle, and top of the treatment, excluding casing that stays outside the design. Keep all three measurements. If the wall narrows toward the top, decide where the end gaps or trim will absorb that difference before marking equal openings.
The equal-opening formula
Let W be the covered wall width, b the actual face width of a vertical board, and n the number of clear openings. You need n + 1 vertical boards. The clear opening is [W − (n + 1) × b] ÷ n. The center-to-center distance between adjacent boards is the opening plus b. A negative opening means the selected board count cannot fit.
For a 144-inch wall, 2.5-inch boards, and six openings, seven boards occupy 17.5 inches. The remaining 126.5 inches creates six openings of 21.083 inches, or about 21 1/12 inches. The repeating distance is approximately 23.583 inches. Keep the unrounded result in your drawing rather than rounding every repeat and accumulating the error.
Mark every board from the same edge
Record each board's left edge as its index multiplied by the repeating distance. In the example, the first left edge is 0 and the final one is 141.5 inches, leaving exactly 2.5 inches for the last board. Mark each position from the same starting point. Repeatedly measuring from the previous mark can compound a small error.
Tape the board widths on the wall. Stand in the doorway, then look from the usual seating position. Check whether an outlet falls against a batten, a switch meets the proposed rail, or the bed sits awkwardly between openings. Try one more and one fewer opening while the layout is still tape.
How long should the battens be?
Decide whether vertical pieces run between the horizontal rails or behind them. If they fit between rails, the cut length is the distance between the installed rail edges, not the total height of the treatment. For example, a top rail finishing 60 inches above the floor and measuring 3.5 inches tall has its lower edge at 56.5 inches. If the bottom rail finishes at 4 inches, the nominal space between them is 52.5 inches.
Treat that number as a planning dimension. Floors and rails may vary along the wall, so verify the individual openings before final cuts. Record actual board thickness too: a batten projecting past existing baseboard needs a deliberate transition. A drawing that resolves the front elevation can still leave an untidy side profile.
Why linear footage is not a shopping list
List vertical battens, top rail, bottom rail, cap, and any backing panels separately. Seven battens at 52.5 inches require 367.5 linear inches, but that total alone does not tell you how many stock boards to buy. Two 52.5-inch pieces cannot come from one 96-inch board. Use the cut planner for each profile and stock length.
Measure a sample board’s face width and thickness before placing the order. Add primer, paint, filler, adhesive, and fasteners to the shopping list. For the attachment plan, identify the wall surface and the trim material first, then check which fastener or adhesive the trim maker specifies for that combination.
Outlets and existing paint
Keep covers, switches, and other services accessible. Where trim would interfere with an electrical fitting, change the layout or have the required work assessed by a qualified professional. Before disturbing old painted surfaces, consult EPA's lead-safe renovation guidance; pre-1978 homes may contain lead-based paint, and EPA recommends lead-safe certified contractors for renovation work in those homes.
- Confirm both end conditions and the number of openings on the saved drawing.
- Check the treatment against furniture and door movement.
- Verify the wall condition, material instructions, and attachment method.
- Label planning dimensions separately from final measured cut lengths.
Using these measurements in the wall planner
The height example in this guide allows different top and bottom rail widths. The interactive wall planner uses one entered trim width for every rail and vertical. With a 60-inch treatment and 2.5-inch trim throughout, its vertical cuts are 55 inches, not the 52.5-inch cuts in the different-width manual example. Choose the detail first, then use the matching calculation.