A crooked cabinet door does not tell you which screw to turn. First find out whether the door is catching on something, moving on a loose attachment, or sitting out of alignment on secure hinges.
In this answer
1. Record the symptom before changing it
This workflow is for ordinary side-hinged cabinet doors. Lift-up fronts, sliding doors and spring-loaded specialty fittings need their own instructions. For a room door with a latch and strike plate, use the separate interior-door diagnosis guide.
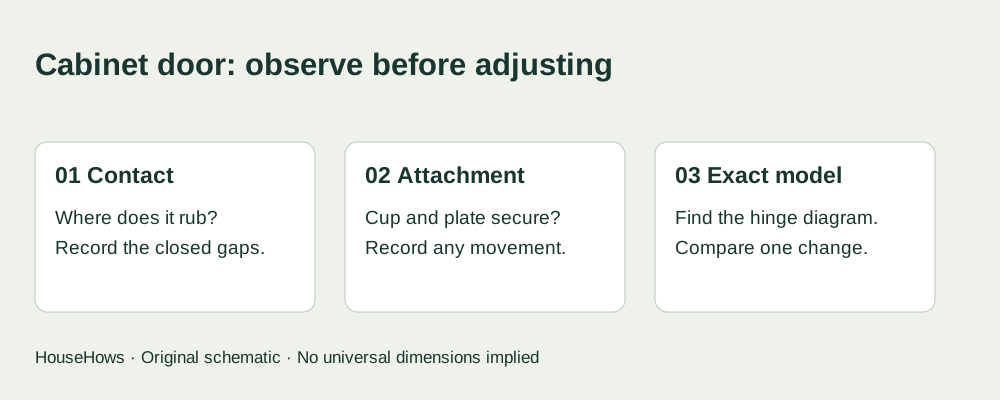
Clear the door's swing and check that a container, shelf edge or misplaced item is not in the way. Open and close the door slowly without forcing it. Note where contact begins: at the top, bottom, hinge edge, neighboring door, or only during the final part of closing.
Take one straight-on photo with the door closed and a second showing every hinge with the door open. Label the affected door by location, such as “sink cabinet, left door.” If the fault appeared after a change, record it: a new hinge, a replaced bumper, a moved cabinet, or water damage. Timing is a clue, not proof of a cause.
Support before inspecting. If a door is hanging loose, an attachment is pulling out, or the surrounding panel is cracked or swollen, stop cycling it. Have a second person support a heavy door. Fixing the attachment or damaged panel comes before alignment.
Enlarge diagram
Swipe across to see the rest of the diagram.
2. Check what is moving
With the door supported, watch the hinge cup in the door and the mounting plate on the cabinet while gently moving the door through a short arc. Look for movement between each fitting and the panel. A secure hinge's joints move; the cup or plate should not peel away from its mounting surface.
Photograph any separation. Do not interpret a screw that turns without gripping as an invitation to keep tightening. Record a loose attachment, a stripped hole or a visibly broken fitting separately. This guide does not prescribe a repair for damaged particleboard or substitute screws of unknown length.
On a clip-on hinge, also check whether the arm is seated on its plate according to the model's attachment instructions. Do not release a clip just to investigate an unsupported door. Blum's CLIP top BLUMOTION system, for example, uses a clip connection and provides separate side, height and depth adjustments. The available height mechanism depends on the mounting plate.
3. Map the gaps instead of guessing at a screw
A reveal is the visible gap around a closed door. On the worksheet, record top-left, top-right, bottom-left and bottom-right gaps. Also record the gap at the upper and lower ends of each vertical edge. Use the same reference edges for every reading. If the door cannot close without contact, write “contact” instead of inventing a zero measurement.
For an inset door, measure against its surrounding opening. For an overlay door, record how the door covers the opening as well as its relation to adjacent fronts. A neighboring door may also be out of alignment, so it is not automatically a reliable reference.
Scroll across to read every column.
| What you observe | What to check next | What it does not prove |
|---|---|---|
| One corner rubs; the opposite corner has a larger gap | Check attachments, then compare the door edge and opening for a skewed pattern. | That the top hinge needs a particular clockwise turn. |
| The top edge looks level, but both corners are too high or too low | Compare height with the opening and adjacent door; consult the hinge's height-adjustment diagram. | That every visible screw is a height adjuster. |
| The face stands proud on one side | Check for an obstruction or displaced bumper, then compare depth at the hinge and handle edges. | That a stronger closing spring will pull it into place. |
| The door moves freely, then stalls near closed | Separate final-edge contact from damping behavior; identify the hinge and any catch. | That the soft-close mechanism has failed. |
| Several doors changed alignment together | Record the wider pattern and inspect the cabinet's condition before adjusting individual doors. | That several hinges failed at the same time. |
4. Identify the hinge before choosing an adjustment
Photograph the logo, all stamped numbers, the hinge arm, the cup and the mounting plate. A brand name alone is not a model number. Keep any plate code with the hinge code, and find the corresponding manufacturer diagram.
Blum's Singapore FAQ for CLIP top BLUMOTION 107° distinguishes overlay, dual and inset versions. It also says a replacement from another brand requires attention to the mounting plate and existing boss hole. A matching cup diameter alone is therefore an incomplete replacement check.
Copy the diagram's adjustment names onto your notes. Do not use a universal “front screw does X” rule: mounting screws, adjustment cams and attachment mechanisms can look similar. If the fitting cannot be identified, send the photos and measured gaps to the cabinet supplier before turning screws experimentally.
5. Test one documented change, then compare
Once the fittings are secure and the model is identified, use the manufacturer's adjustment sequence and limits. Mark or photograph the starting position. Change one adjustment at a time, support the door as instructed, and close it gently to compare the same gaps again. Do not loosen all the hinges together.
The 107° Blum FAQ recommends a Phillips screwdriver for controlled adjustment. It also distinguishes a soft-close deactivation switch from adjustable damping strength: the latter is not provided on that product. It lists alignment, insufficient clearance and a small or lightweight door among possible reasons for a final-closing problem. Those checks are product-specific, not a diagnosis of every soft-close hinge.
If the documented adjustment produces no improvement, reaches its limit, or makes another edge bind, stop and preserve the before-and-after record. Do not file the door or bend a hinge to compensate for an unexplained fit problem.
A worked diagnosis: a tight upper gap
Illustrative scenario, not a repair report: the gap between two doors measures 1 mm near the top and 4 mm near the bottom. The left door rubs at the upper meeting edge. Both mounting plates appear secure.
The useful conclusion is “the meeting gap tapers,” not “replace the upper hinge.” Check both doors against the cabinet, identify the fittings and inspect for edge contact. If a documented alignment adjustment improves the top gap but creates bottom contact, record both changes and reassess. The numbers describe this example; they are not recommended reveal dimensions.
Finish with a repeatable result
Close and reopen the door several times without extra pressure, then photograph and remeasure the original problem locations. Record whether rubbing, proudness or the closing stall remains. A useful result is “upper meeting edge clears; bottom gap unchanged,” rather than simply “adjusted.”
Do not add lubricant as a default next step. Blum's 107° FAQ describes the hardware as generally maintenance-free and specifically cautions against WD-40 during care. Follow the instructions for your actual fitting.
Use page 1 of the hardware measurement worksheet to keep the symptom, fitting codes, gap readings and result together.
Keep the measurements beside the model requirements.
Open hardware measurement sheetSources
- Blum US: CLIP top BLUMOTION assembly and installation ↗
Attachment method and adjustment axes; consult the matching model instructions.
- Blum Singapore: CLIP top BLUMOTION 107° FAQ ↗
, 2024 V1, printed pages 7, 9–10 and 13. Regional, product-specific guidance; not a universal hinge specification.